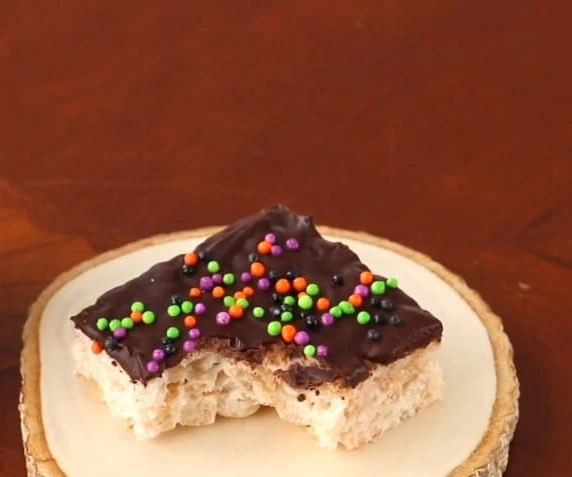
Chocolate Dipped Rice Krispie Treats
Rice krispie treats dipped in chocolate are a delicious variation of the original classic. Their sweet, chewy texture is perfectly complemented by a layer of semi-sweet, milk, or white chocolate, making them extra delicious and irresistible. These treats are so simple to make, yet they feel like an upgraded version, quickly disappearing at any gathering. Loved equally by kids and adults, they’re an easy way to create something memorable. Whether you’re indulging in nostalgia or crafting a quick
chocolate covered rice krispie bars, these delicious snacks never fail to impress.

Why You’ll Love Chocolate Covered Rice Krispie Treats
Transform rice krispie treats into a dessert everyone loves with a rich layer of chocolate. Using only 6 ingredients found in your pantry, these no bake recipes are perfect for quick, allergy-friendly options. Customize them with sea salt or sprinkles, and enjoy a gluten-free treat ready in just 8 minutes—no oven required! Perfect for saving time while still creating something delicious in the kitchen.
Ingredients Needed for Chocolate Covered Rice Krispie Treats
- Butter: Choose either regular butter or vegan butter if you’re looking for a dairy-free option. Both work well in this recipe.
- Chocolate Chips: You can use semisweet, dark, or white chocolate chips. For a twist, chop a chocolate bar into small pieces, or opt for vegan chocolate if needed.
- Vanilla Extract: A high-quality vanilla extract or real vanilla will bring out the full flavor in your rice krispie treats.
- Mini Marshmallows: These melt faster than regular marshmallows. However, you can also use the larger variety and chop them to fit into your mixture.
- Rice Krispies: These crunchy cereal bits form the base of the treat, holding all the melted marshmallow and chocolate together.
Step by Step Instructions
Step 1: Line Your Pan
Start by lining an 8×8 or 9×9 baking pan with parchment paper for easy removal of the treats once they set.
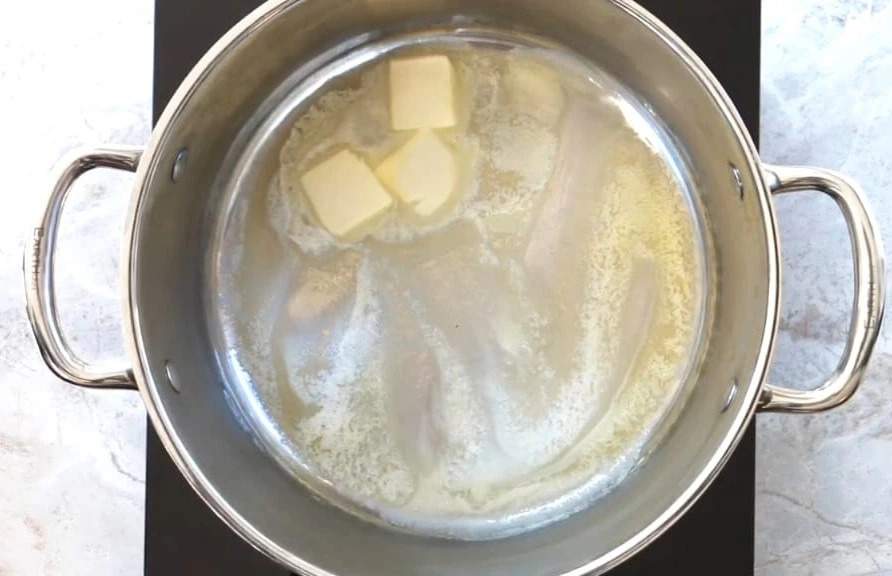
Step 2: Melt the Butter
In a large pot, melt the butter over medium heat, ensuring it doesn’t burn.
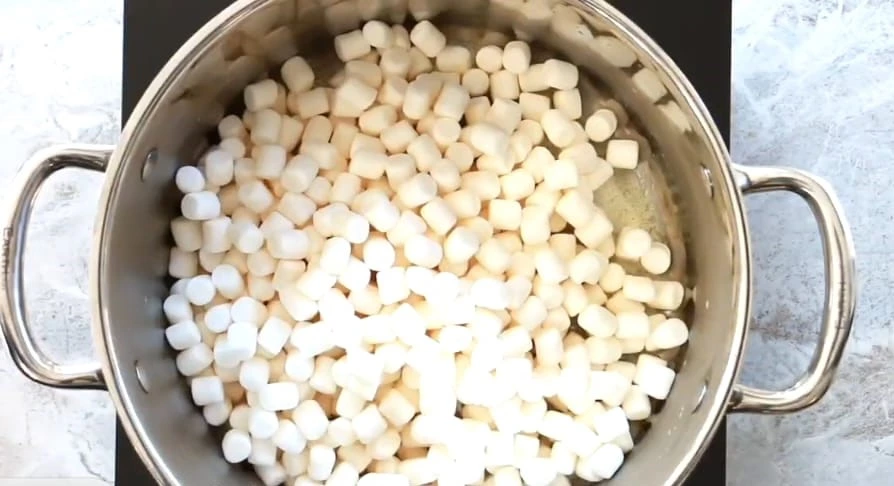
Step 3: Add Marshmallows
Add 6 cups of marshmallows (set aside one cup) to the pot and stir until melted. Once melted, mix in the vanilla extract for a flavorful base.
Step 4: Mix in the Rice Krispies
Stir in the rice krispie cereal and the remaining cup of marshmallows. Stir quickly to ensure everything is well combined.
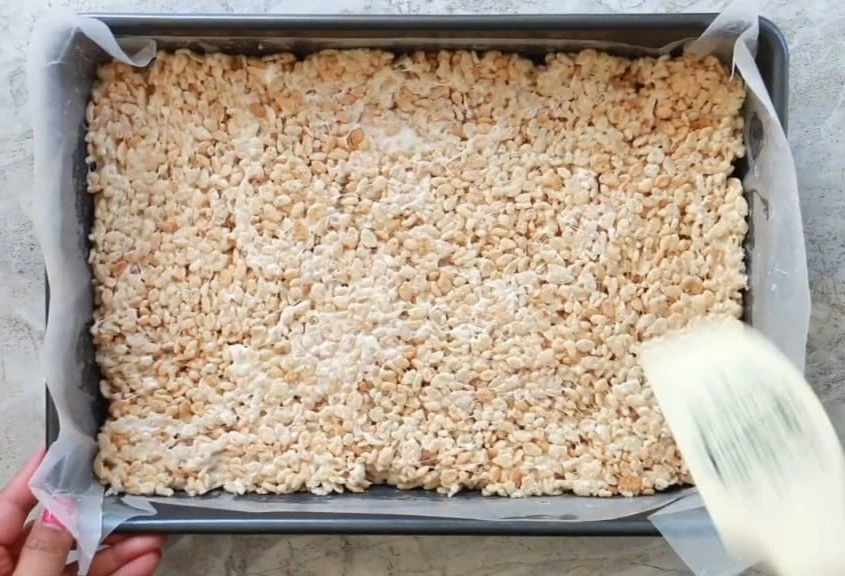
Step 5: Press Into the Pan
Pour the mixture into your prepared pan. Use a greased spatula or your hands to press the mixture into an even layer.
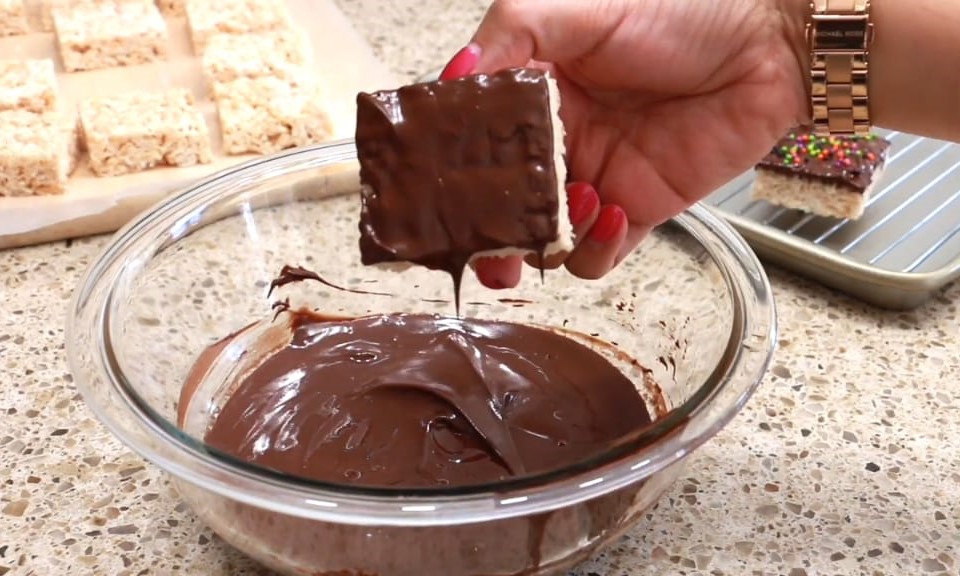
Step 6: Melt the Chocolate
In a microwave-safe bowl, melt the chocolate and butter together in 20-second increments, stirring after each to ensure it’s smooth and fully melted.
Step 7: Spread the Chocolate
Once the chocolate is melted, pour it over the rice krispie mixture and use an offset spatula to spread it Or dipped it into an even layer. Sprinkle sea salt or sprinkles on top if desired.
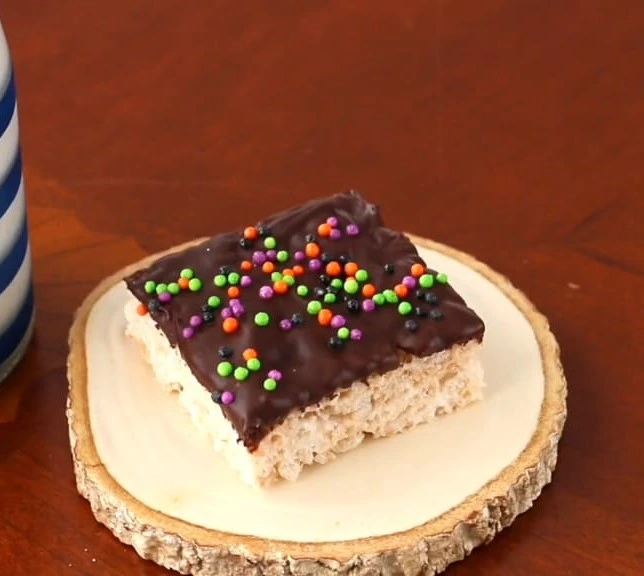
Step 8: Let Set and Slice
Allow the chocolate covered rice krispie treats to set completely before removing from the pan and slicing into squares.

Expert Tips for Making the Perfect Chocolate Coated Rice Krispie Treats
- Substitute butter with neutral oil or refined coconut oil in the chocolate coating for a dairy-free option.
- Avoid pressing the rice krispie treats too hard into the pan to prevent them from becoming hard and dense.
- Using a 9×9 pan instead of an 8×8 pan will result in slightly thinner bars, so adjust expectations accordingly.
- To achieve a thicker layer of chocolate, increase the chocolate chips to 2 cups and add 3 tablespoons butter.
- Always melt butter and marshmallows on medium heat or medium-low heat to avoid burning.
- If using regular marshmallows, chop the large marshmallows into small pieces before stirring them in.
Storage Instructions
To keep these treats fresh, place them in an airtight container with wax paper sheets layered between to prevent sticking. Store at room temperature for up to 3 days. If you prefer to keep them longer, freeze them in a sealed container, again with wax paper separating the layers, for up to 6 weeks. When ready to serve, allow them to thaw for 15 minutes at room temperature for the best texture and flavor.
Try This Delicious Recipe
FAQs
How do I prevent Rice Krispie treats from getting too hard?
Avoid pressing the mixture too firmly into the pan and melt marshmallows over medium heat to prevent toughness.
Do I need to refrigerate Rice Krispie treats after adding chocolate?
Refrigeration helps the chocolate set faster but isn’t required unless your kitchen is very warm.
How long can I store Rice Krispie treats?
They stay fresh in an airtight container at room temperature for up to 3 days.
Can I use vegan marshmallows for this recipe?
Yes, vegan marshmallows work perfectly as a substitute for regular marshmallows.
What can I use if I don’t have parchment paper?
Grease the pan lightly with butter or use aluminum foil as an alternative.
Can I make this recipe without butter?
Yes, swap butter with neutral oil or refined coconut oil for similar results.

Chocolate-dipped Rice Krispie treats
Ingredients
- 6 cups Rice Krispie cereal
- 7 cups mini marshmallows split as 1 cup for mixing and 6 cups for melting.
- 4 tablespoons butter plus 2 tablespoons for the chocolate layer
- 1 ½ cups chocolate chips semisweet, dark, or milk
- 1 teaspoon vanilla extract
- Sea salt or sprinkles for topping optional
Instructions
- Prepare an 8×8 or 9×9 baking pan with parchment paper to prevent sticking and ensure easy removal.
- In a large pot, melt the butter over medium heat until smooth.
- Six cups of marshmallows should be added, with one cup set aside. Melt the butter and stir the marshmallows until the butter is completely melted. For added taste, add a little vanilla essence.
- Stir in the rice krispie cereal and the remaining cup of marshmallows. Mix quickly to ensure everything is combined.
- Transfer the mixture to your prepared baking pan. Use a greased spatula or your hands to gently press it into an even layer.
- In a microwave-safe bowl, heat the chocolate and butter in 20-second increments, stirring after each session, until completely melted.
- Pour the melted chocolate over the cereal layer Use an offset spatula to spread it evenly.
- Sprinkle with sea salt or sprinkles for a fun finish. Let the treats set completely before slicing and serving.