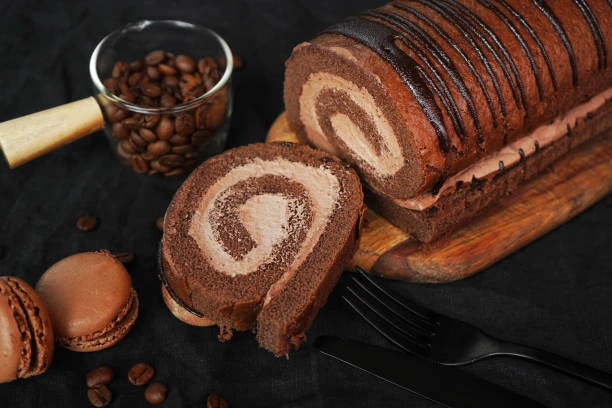
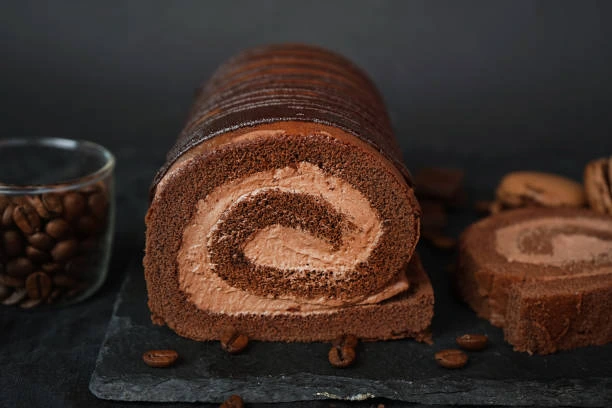
Double Chocolate Swiss Roll Cake
If you love the rich, velvety taste of chocolate and want to impress your friends and family with a showstopping dessert, the Double Chocolate Swiss Roll Cake is the perfect treat for you. This luscious creation combines soft, airy chocolate sponge cake with creamy indulgent chocolate filling, all rolled into a beautiful spiral. Whether you’re an experienced baker or a passionate beginner, this guide will walk you through every step to master the art of creating the perfect chocolate cake roll.
Love This Chocolate Swiss Roll Recipe
This chocolate cake roll isn’t just a dessert—it’s a showstopper that’s perfect for any occasion. Whether it’s a festive gathering or a simple treat for yourself, this dessert delivers on all fronts. We’ve fine-tuned the process and ingredients to ensure you end up with a light, spongy cake rolled around a creamy filling and finished with a glossy chocolate topping. Trust us—it’s worth every whisk, fold, and roll.
Here’s why you’ll absolutely love this chocolate swiss roll recipe:
- It’s versatile! You can customize the filling and toppings to create your signature version.
- It looks stunning but is surprisingly simple to make.
- The balance of flavors—from the rich chocolate sponge to the delicate cream filling—is irresistible.
Why This Recipe Works
The Double Chocolate Swiss Roll Cake delights in its simplicity and versatility. Here’s why this recipe is a go-to for chocolate lovers and home bakers alike:
Customizable: This chocolate cake roll recipe is easily adaptable with substitutions and added flavors for endless variations.
Fluffy Sponge Cake: The chocolate sponge roll is designed to be ultra-light while still strong enough to hold its shape.
Irresistible Filling: The chocolate cream roll filling adds a luxurious richness that takes this dessert to the next level.
Minimal Cracks: Follow this recipe carefully, and you’ll learn tips to avoid common issues like cracking when rolling.
Types of Sponge Cakes
Understanding the types of sponge cakes is key to nailing the texture of your chocolate Swiss roll recipe. The most common types used for roll cakes include:
Japanese-style Castella Cake: A bouncy, moist sponge that works beautifully for rolls requiring precision and flexibility.
Genoise Cake: A classic European sponge with whole eggs, known for its elasticity and slightly denser texture.
Chiffon Cake: Light and airy due to the addition of oil and whipped egg whites, perfect for beginners needing a forgiving base.
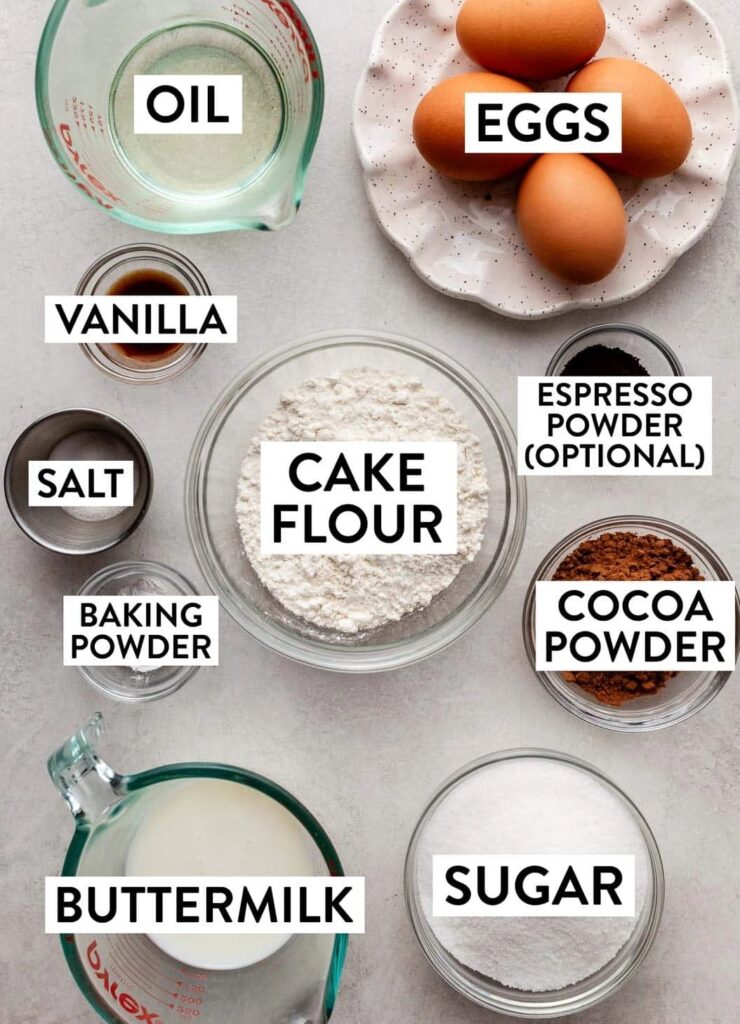
INGREDIENTS FOR CHOCOLATE SWISS ROLL CAKE
1. All-Purpose Flour
A light, fluffy sponge starts with the right flour. Using all-purpose flour ensures the ideal balance of structure and softness. For an even more delicate crumb, pastry flour can be used. To avoid a tough or dry texture, measure carefully—preferably with a scale. If using cups, fluff the flour with a spoon, spoon it into the measuring cup, and level it off with a knife.
2. Granulated Sugar
The foundation of a sweet, tender, and moist cake lies in granulated white sugar. Besides enhancing flavor, sugar also helps retain moisture, ensuring the sponge remains soft and pliable.
3. Pure Vanilla Extract
Though chocolate is the dominant flavor, pure vanilla extract elevates and enhances it. A small amount adds depth, making the bittersweet cocoa solids shine even more.
4. Eggs
The key to a light, airy sponge is the right amount of whole eggs. No need for separation; simply whip them well to incorporate air. This helps create a fluffy, rollable cake.
5. Cocoa Powder
For an intense chocolate flavor, opt for high-quality Dutch-process cocoa powder. Unlike regular cocoa, it undergoes an alkalization process, which deepens the taste and provides a richer color. Be sure to use unsweetened cocoa powder rather than a mix, ensuring the cake remains perfectly balanced.
6. Oil
Unlike butter, which solidifies when cold, oil keeps the sponge soft and flexible even when refrigerated. Just a few tablespoons prevent a crumbly texture, allowing the cake to roll without cracking.
7. Whipping Cream
The heart of this cake is its whipping cream filling. Use heavy cream with at least 35% milk fat for a luscious, stable texture. When whipped to soft peaks, it creates a smooth, airy contrast to the rich chocolate sponge.
8. Dark Chocolate
For a bittersweet taste, use dark chocolate with 50-70% cocoa solids. High-quality chocolate callets melt evenly, making them ideal for mixing into the filling or drizzling over the roll for an extra layer of indulgence.
STEP BY STEP INSTRUCTIONS: HOW TO MAKE CHOCOLATE CAKE ROLL
Step 1: Whip the Eggs
Begin by whipping eggs on medium-high speed for about three minutes. Use an electric stand mixer with a whisk attachment or a hand mixer in a large mixing bowl. The goal is to create a frothy, pale mixture that will give the cake its signature light texture.
Step 2: Add Sugar and Beat Until Fluffy
Gradually add sugar while continuing to beat for another 4-5 minutes. The mixture should triple in volume and become thick, fluffy, and billowy, resembling shaving cream or marshmallow fluff. When lifted with a beater, it should flow in soft folds and ribbons rather than sinking into the base.
Step 3: Mix in Oil, Vanilla, and Salt
Gently mix in oil, vanilla, and salt until fully blended. The oil ensures a moist and flexible texture, making the cake easier to roll without breaking.
Step 4: Combine the Dry Ingredients
In a separate medium bowl, sift together flour, cocoa powder, and baking powder. Whisk well to distribute the ingredients evenly. Sifting twice helps create a light, lump-free batter.
Step 5: Fold Dry Ingredients into the Egg Mixture
Sift the dry ingredients directly over the egg mixture. Using a rubber spatula, carefully fold everything together until just combined. Avoid over-mixing, as this can deflate the batter and make the cake dense.
Step 6: Bake the Batter
Spread the batter into a thin layer in a prepared pan. Bake for 9-11 minutes until the sponge springs back when pressed gently. The short bake time keeps it soft and flexible for rolling.
Step 7: Cool the Cake on a Wire Rack
Transfer the pan to a wire rack and let it cool for about 3 minutes. A slightly warm cake is easier to handle and roll without cracks.
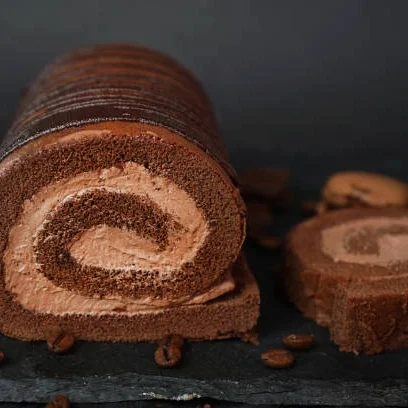
Step 8: Roll and Fill
Once slightly cooled, carefully roll the sponge into a log shape with a clean kitchen towel. Let it set before unrolling, filling with whipped cream, and rolling back up. Now, your Chocolate Swiss Roll cake roll is ready to enjoy!

Expert Baking Tips for Chocolate Roll Cake
- Temperature Is Key: Use room-temperature ingredients for consistent texture.
- Avoid Overmixing: Overmixing can deflate your batter and make the cake dense or tough.
- Rolling While Warm: Rolling the cake when warm and pliable prevents cracks.
How to Prevent Cracks in Swiss Roll Cake
Cracks can be the bane of any roll cake, but these tips will keep your chocolate sponge roll smooth and seamless:
Apply even pressure when rolling to avoid splitting.
Roll immediately after removing from the oven while the cake is still warm.
Don’t overbake—you want the cake to stay soft and bendable.
Storing and Freezing Chocolate Cake Roll
Store the chocolate cake roll in an airtight container in the refrigerator for up to 3 days to keep it moist and fresh. For freezing, wrap the roll tightly in plastic wrap and then in foil to prevent freezer burn. Freeze for up to 2 months and thaw in the fridge before serving. Avoid storing at room temperature to maintain its soft texture.
More Recipes You Love
Double Chocolate Swiss Roll Cake
Ingredients
For the Sponge Cake:
- 4 large eggs
- 1/2 cup granulated sugar
- 1/4 cup cocoa powder
- 1/2 cup all-purpose flour
- 1/2 tsp baking powder
- 1 tsp vanilla extract
For the Chocolate Filling:
- 1 cup heavy cream
- 2 tbsp powdered sugar
- 1 cup dark chocolate finely chopped
Instructions
- Start by preheating your oven to 350°F. Lightly grease the bottom and sides of a baking sheet or jelly roll pan with cooking spray or melted butter. Line it with parchment paper and lightly spray the paper as well. This prevents the sponge cake from sticking and ensures a smooth release.
- In a large bowl, use an electric stand mixer with a whisk attachment or a hand mixer to beat the eggs on medium-high speed for about 3 minutes until frothy and pale. Gradually add sugar and continue beating for 4-5 more minutes. The mixture should triple in volume, becoming thick, fluffy, and billowy like shaving cream or marshmallow fluff. When lifted with a beater, the mixture should fall back in folds or ribbons rather than sinking immediately.
- Add vanilla extract and salt, then slowly drizzle in oil while mixing. Ensure everything is incorporated well without overmixing.
- Sift together flour, cocoa powder, and baking powder into a medium bowl and whisk them to blend evenly. Sift the dry ingredients again over the egg mixture and use a rubber spatula to gently fold them in two stages. Ensure there are no streaks of flour left but avoid over-mixing, which can deflate the batter.
- Carefully spread the batter in an even, thin layer on the prepared baking sheet using an offset spatula. Bake for 9-11 minutes, or until the cake springs back when pressed gently. Be careful not to overbake, as it can dry out the surface.
- Roll and Cool the Cake
- Transfer the pan to a wire rack and let it cool for a minute. Lightly dust the cake with icing sugar or cocoa powder. Run a knife along the edges to release it, then carefully invert onto a clean kitchen towel or another parchment sheet. Gently peel off the top layer of parchment. While still warm, roll the cake into a tight log starting from the short side, incorporating the kitchen towel or parchment in the process. Let it cool completely in this rolled shape with the seam side down.
- To make a chocolate ganache, heat ⅓ cup (80ml) whipping cream in a saucepan over medium heat until it starts to simmer. Remove from heat and add chopped dark chocolate. Let it sit for a minute, then whisk until smooth and glossy. Let it cool for 5 minutes. In a separate bowl, beat ¾ cup (180ml) whipping cream until it forms firm peaks, then gently fold in the cooled ganache.
- Carefully unroll the cooled cake and spread the chocolate filling evenly, leaving about a ½-inch border around the edges. Apply a bit more filling to the end that will form the center of the spiral for a well-defined shape. Roll up the cake again, then transfer it to a serving plate or baking sheet. Cover it with plastic wrap and refrigerate for at least 2 hours to set. Before serving, dust with cocoa powder for a beautiful finish.
Notes
FAQs
Why did my chocolate Swiss roll crack when rolling?
Overbaking or a dry sponge can cause cracks. Bake just until the cake springs back and roll it while warm using a towel to prevent breaking.
How do I keep my Swiss roll cake soft and moist?
Use oil instead of butter for flexibility, avoid overbaking, and store it in an airtight container in the fridge to retain moisture.
How long should I whip the eggs for a fluffy sponge?
Whip for 3 minutes until frothy and pale, then add sugar and continue beating until the mixture triples in volume for a light texture.
How do I make my Swiss roll look smooth and neat?
Trim the edges for a clean look, roll gently using parchment paper, and chill before slicing for even, smooth cuts.
Can I use regular cocoa powder instead of Dutch-process?
Yes, but Dutch-process cocoa gives a richer flavor and darker color. If using regular cocoa, add a pinch of baking soda for balance.